Target Audience: Intermediate devs, comfortable creating materials and/or shaders in their chosen engine.
Implementation Examples: Unity + UDK
Last Updated: Jan 2014
Index:
The Theory
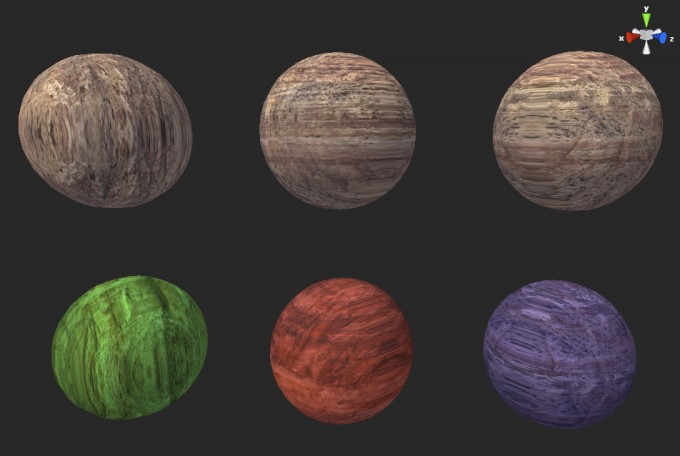
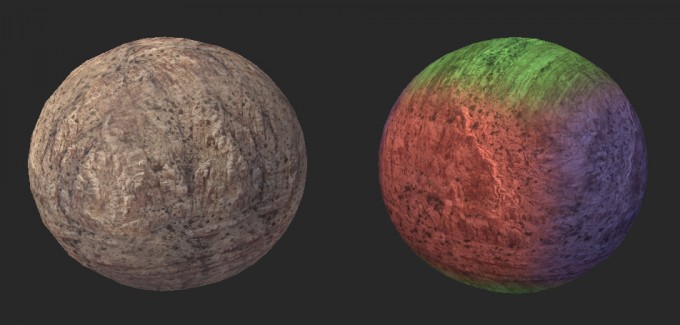
So, what is this triplanar mapping, and what’s it for? The general idea is that we map a texture three times with planar maps (thus the tri-planar bit) along the X, Y, and Z axes, and then blend between these three samples based on the angle of the face, using the one that fits best with the least stretching. In theory we’ll never have a stretched texture or hard seams, and we don’t even have to UV map our mesh!
Look Ma, no seams!
So, how do we go about this? The first thing we want to do is generate the three planar UV sets that we’ll be using. For this, we’ll use the world position of our fragment. If we use the XZ world position of our fragment as the UV coordinate to sample from, it will give us a planar map projecting from the Y axis. We can also get an X projection using the ZY position, and a Z projection from the XY position.
We’re also going to need a blend weight to decide what UV set to use. We base this off of the world vertex normal. We can use the absolute value of each axis, so if the surface normal is pointing strongly in the positive or negative Y direction for example, we can blend in more of the texture sample from the Y-projected plane.
Drawbacks
Because normal mapping relies on a mesh’s tangents jiving with it’s UVs, and since we’re using the world coordinates as stand-ins for our UVs, the tangents of the mesh certainly won’t jive. You can still use normal maps to give some lighting variation to the surfaces, but they won’t be correct.
It’s also not as efficient as traditional UV mapping. The calculations to determine the UV coordinates and blend weight isn’t too performance heavy, but we are taking 3 times the texture lookups than we would be otherwise. This isn’t too bad when we’re just sampling diffuse textures, but if you’re also planning to sample specular maps, detail maps, normal maps, etc; you’ll have to keep an eye on the number of samples you’re using.
Implementation – Unity
Shader "TriplanarTutorial/Triplanar_Final"
{
	Properties
	{
		_DiffuseMap ("Diffuse Map ", 2D)  = "white" {}
		_TextureScale ("Texture Scale",float) = 1
		_TriplanarBlendSharpness ("Blend Sharpness",float) = 1
	}
	SubShader
	{
		Tags { "RenderType"="Opaque" }
		LOD 200

		CGPROGRAM
		#pragma target 3.0
		#pragma surface surf Lambert

		sampler2D _DiffuseMap;
		float _TextureScale;
		float _TriplanarBlendSharpness;

		struct Input
		{
			float3 worldPos;
			float3 worldNormal;
		};

		void surf (Input IN, inout SurfaceOutput o)
		{
			// Find our UVs for each axis based on world position of the fragment.
			half2 yUV = IN.worldPos.xz / _TextureScale;
			half2 xUV = IN.worldPos.zy / _TextureScale;
			half2 zUV = IN.worldPos.xy / _TextureScale;
			// Now do texture samples from our diffuse map with each of the 3 UV set's we've just made.
			half3 yDiff = tex2D (_DiffuseMap, yUV);
			half3 xDiff = tex2D (_DiffuseMap, xUV);
			half3 zDiff = tex2D (_DiffuseMap, zUV);
			// Get the absolute value of the world normal.
			// Put the blend weights to the power of BlendSharpness, the higher the value,
            // the sharper the transition between the planar maps will be.
			half3 blendWeights = pow (abs(IN.worldNormal), _TriplanarBlendSharpness);
			// Divide our blend mask by the sum of it's components, this will make x+y+z=1
			blendWeights = blendWeights / (blendWeights.x + blendWeights.y + blendWeights.z);
			// Finally, blend together all three samples based on the blend mask.
			o.Albedo = xDiff * blendWeights.x + yDiff * blendWeights.y + zDiff * blendWeights.z;
		}
		ENDCG
	}
}
Implementation – UDK
Uses

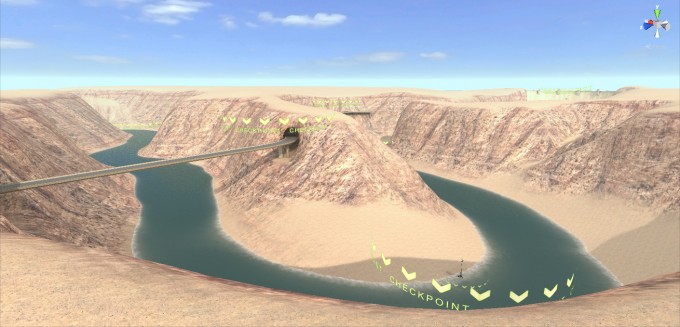
I utilized triplanar mapping to create this canyon in Project Full Throttle.
Terrain: Probably the best use of triplanar mapping, using it with a terrain shader allows you to have steep inclines and more complex shapes than would be possible with just planar mapping.
Rocks: When creating rocks, you can bake normals from a high poly mesh, but use triplanar mapping for the diffuse texture to avoid seams.
Trees: Tree trunks and branches can be a pain to UV, and their seams are often very noticeable. Use a triplanar shader on them to eliminate seams completely.
Placeholder assets: Triplanar mapping lets you quickly throw on generic textures or grids on placeholder or WIP assets that may not be UV mapped.
Voxel Rendering: Because voxel rendering procedurally creates geometry, triplanar mapping is an ideal way to generate texture co-ordinates.


Comments 14
Hello! Nice shader.
In 18.2 I am seeing some odd behavior. When looking down on the tops of the objects, you can see the edges or other objects come through. Almost like the triplanar is transparent on the top. Any one know how to fix this? I think it has to do with the light direction or something, but after learning through a few other triplanar tutorials, I still can’t seem to fix it. (I’m a shader newb)
Figured it out. Need to add a fallback shader at the bottom.
Apparently there is some weirdness with the shadows. I had mixed results with the compiler parameter “noshadows”, then I found a thread talking about the fallback. But that fixed for anyone else seeing this oddity.
I can report that this same shader ports almost directly over to UE4.
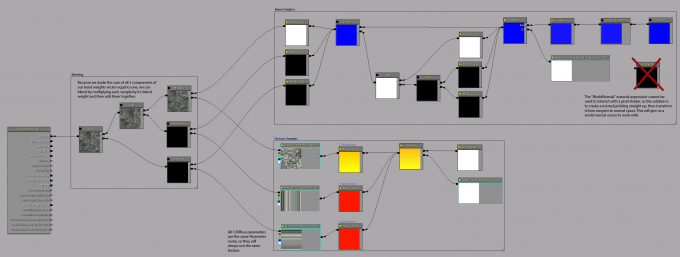
Here is an image of the material for UE4 to do the same: https://i.snipboard.io/QYf9yv.jpg
Author
Thanks Craig! If you sent me a better quality version of that (png), I can include it in the post!
I love you man, seriously I love you so much…
Should this same principle work in Amplify Shader Editor?
Also what is a vector transform, I can’t find that node when I type it in.
Author
Yes it should be possible in any shader editor.
In the UDK example, there’s an oddity, where you can’t get the vertex normal from the pixel stage. All I did here was take an ‘up vector’ (0, 0, 1) and transfrom it from tangent space to world space. This gives the same value as if you were able to get the vertex normal directly.
For your case, you just want to get the world normal here. I haven’t used Amplify, so I’m not sure what the exact node name is.
Very nice shader code. I had my own unity “triplanar” mapping code that didnt use blending. Your code gives a better result so i adapted the mapping of my code to yours.
Using your code also has some sections of the objects that have some “stripes”. Regions where the texture gets sampled on the same u or v coordinate for multiple times. Do you know a way to completely get rid of such regions?
I used vpos instead of worldpos for uv calculation. Using worldpos gets rid of this striped regions.
😀
What is “vpos” ? What’s the differences between this and worldpos ? How can I get this “vpos” in vertex fragment shader (I don’t use surface shader) ?
Thaaanks 🙂
Author
I believe vpos is the vertex position in object space, while the wpos is the vertex position in world space. In your case, just pass through the vertex position without the transform matrix applied to it from your vertex shader to the pixel shader.
Author
If you are very far from the center of the scene, you might be running into some floating point error because the numbers are so large. I’m guessing by using vpos, you end up with numbers starting at the object’s pivot, and are then generally smaller, so you don’t see the issue.
Hi Martin,
Sorry for bumping this old post but I came across it while trying to figure out why I had stretching on a triplanar shaded model, similar to the commenter above.
In the end, it was because my model did not have split vertices along sharp edges, resulting in a kind of normal blurriness from the interpolation across the sharp edge. For example – a vertex on an edge was pointing upwards and was appropriate to texture with the Y projection, but when that same vertex is used by a face on the other side of the edge to calculate the face normals, it results in the Y projected texture being stretched across a no longer appropriate face.